WhatsApp scheduling: how to organize time slots and confirmations
Guide to configure availability, review events, and keep scheduling conflict-free in your WhatsApp operation.
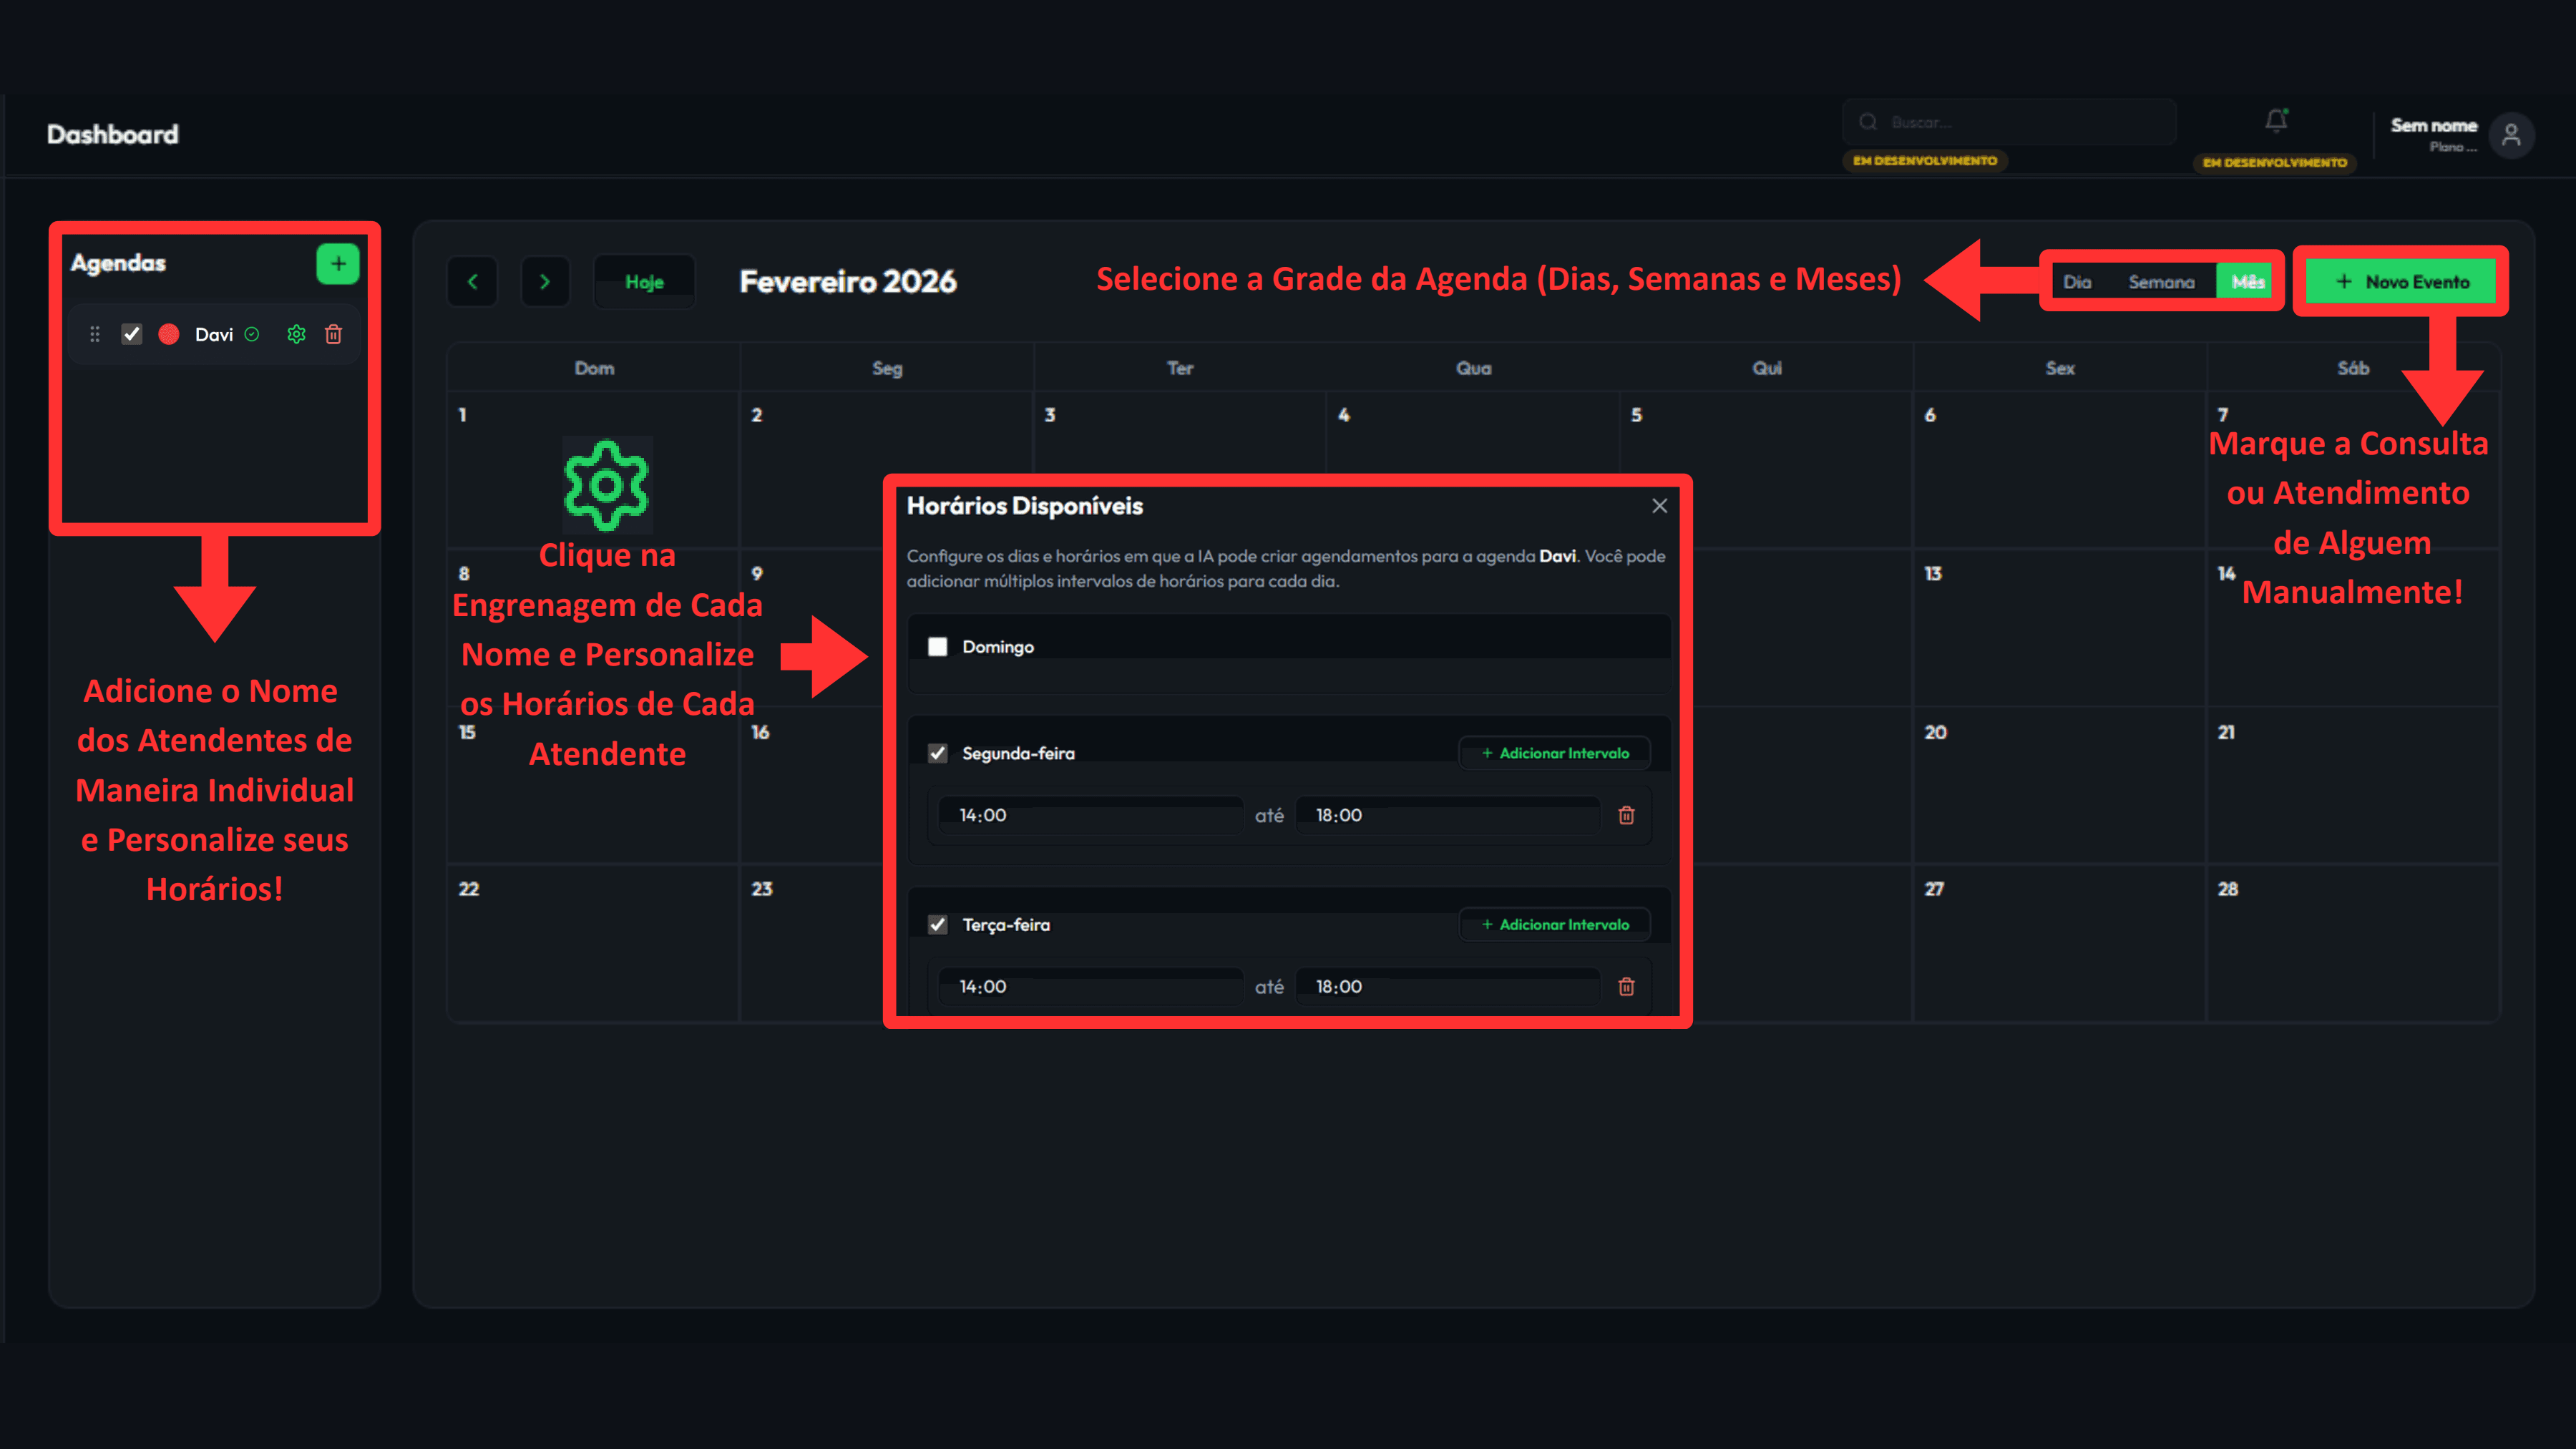
Calendar: complete step by step
What you will learn: organize appointments, avoid scheduling conflicts and keep follow-up up to date in a single flow.
- 1
Open the Calendar module
In the side menu, go to Calendar to view active schedules and agendas.
- 2
Choose the viewing grid
Use Day, Week or Month to better see your routine and availability.
- 3
Create and review events
Fill in contact, date, time, service and essential notes before saving.
- 4
Update markdowns instantly
When there is a change, adjust immediately to avoid conflict and delay.
Recommended pattern
Confirm at the same time: service, time and contact name before saving the appointment.
- At the beginning of the day, review the closest times to reduce absences.
- Use short, to-the-point observations to maintain context between agents.
- At the end of the day, mark who attended and who needs further contact.
Want to see this flow in practice?
Inside the product, this step appears in: Open Calendar · Open Clients.
Next step
If this flow makes sense for your operation, the fastest path is to start a free trial and see AI running inside your own WhatsApp.
Related guides
How to connect WhatsApp Business with a QR code
Practical guide to connect WhatsApp Business with a QR code and confirm the session is ready for operation.
How to train AI for WhatsApp support
Practical guide to configure your business, services, tone of voice, FAQs, and handoff rules inside AutoWhats AI.